tldr - This article is a documentation of learning on creating and deploying a Solana decentralized application (dApp) using Buildspace.
The dApp allows users to create and view a GIF collection stored on the blockchain. In order to build the dApp, I had to learn Rust in order to write the Solana contract and React to build the web app for users to interact with.
I found the learning curve for Rust to be steep, but overall had a positive experience with React. Setting up the local Solana environment was a bit tricky, but I was eventually able to deploy the dApp to Solana.
Along the way, I learned some key Solana-specific terms, such as Solana programs, validators, and accounts. Overall, I found the experience of building a web3 application to be both challenging and rewarding.
Intro
I wanted to get my hands dirty with web3 and blockchain development. So, I signed up to create and deploy a Solana dApp using Buildspace.
This post is to share my learnings and experience.
The plan is to: ✍️ write a custom Solana contract using Rust 💰 build a web app to let users interact w/ it 🚀 deploy it to Solana
Action plan
The plan was laid in three simple steps.
Use Rust to write the Solana contract - This was my first contact with Rust, huge learning curve from what I was used to seeing in Javascript and php.
Build a web app with React for users to interact - I've avoided touching React because I started with Vue and I wanted to stick with it. But experience with React was not too bad.
Deploy to Solana - Setting up the local Solana environment was complicated. To be honest, I still do not understand how it's working, but I got it to work for now! Hopefully understanding will come later.
What is Solana?
Buildspace program started off with an easy introduction to Solana where 'Solana programs' are like smart contracts in Ethereum.
Here are some Solana specific terms I have learnt.
Solana Program is some code living on the blockchain. Programs are "stateless" in Solana.
The ones running the blockchain are called Validators in Solana. Generally, known as miners.
Accounts are owned by users, which the programs interact with. They work like files which holds the data of users.
These were some fundamentals notes before continuing to build.
The frontend - React
Project starter code was provided. I was able to start playing around the code using a browser-based IDE, Replit.
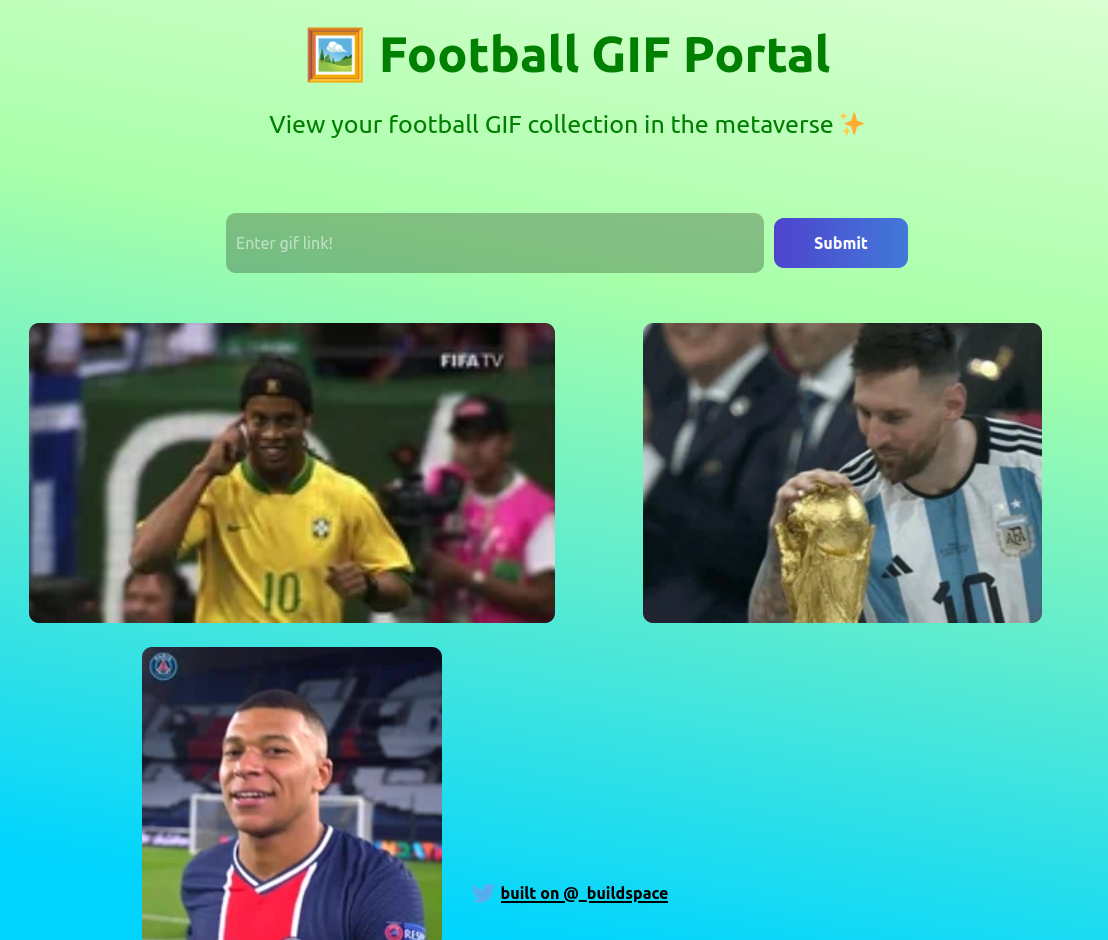
This was the frontend to create and view a GIF collection stored in the blockchain. I decided to go with a football theme (Fifa world cup fever. lol.) with some changed to style.
When creating a web application, its always a magical moment authenticating user.
Web3 has enhanced this experience by authenticating users by connecting a wallet. In this case, Phantom wallet was used to connect.
Connecting Wallet
The solana object is accessible in the window object to check if phantom wallet is already installed, check authorization to access user's wallet.
The response is saved in a variable, which is used to find the wallet address or publicKey.
const response = await solana.connect(); console.log('Connected with Public Key:', response.publicKey.toString());
The view - GIF grid
As for React frontend, using useEffect and useState is pretty cool to manage the app state.
The view is rendered based on this condition check in the frontend. It contains a grid of gifs saved in the collection. For now, just hard coded.
Setting up Solana locally
This was bit tricky, there were some obstacles. Hopefully, it'll only get easier from here considering it's still super early.
Solana programs are written in Rust. Started with installing rust and compiler with cargo (package manager for rust).
Followed solana documentation which was not so bad either.
Testing dependencies
solana-test-validator is how you can set up your own validator on your system to test the program. Also, mocha from npm is helpful for testing later.
Anchor
This is a Solana tool to help run the program locally and to deploy to the real Solana chain.
First Solana Program
Like react web app, we had a starter code provided to quicky begin writing the program.
I gotta admit, things started getting bit fuzzy from here onwards.
Rust syntax looks intimating but luckily, each line of code was explained as we went along.
I wouldn't be able to write any rust code (yet), but I think I got a basic understanding following along.
If I had to explain the code, it would go something like this:
This is the entry point of Solana app, where we create API functions which are called using Anchor in a Javascript file which is connected to the React web app.
The basic flow for Solana program begins at writing code in a rust file, and testing the functions using a javascript file.
Creating the Data Structure
In rust, the account structure is declared with what type of data it can hold. Start off with a counter for total gif.
Then, we specify how this data is initialized. Here the instructions for new account creation are written with space allocation.
There is a reference made to system program, which runs Solana. You can read more in the (Solana documentation.)[docs.solana.com/developing/runtime-faciliti... It comes with an id of 11111111111111111111111111111111.
All of the above codes and then called in the function which has a context referring to these instructions.
Hooking this up to the javascript file to get account data. JS file needs the following:
SystemProgram to access anchor.web3
Create and set the
provider- how anchor communicates with frontend.Generation of account keypair for program to use.
Calling the function from rust file, passed along with needed parameters.
Fetching the data from the account.
At this point, this code is able to call the program and store data.
Updating the data structure
Create a new Context which can access to a mutable reference to previously defined data structure.
This can be used to changed the stored value of data with a new function in Rust file.
Deploying
To connect the web app with the Solana program, it needs to be deployed to the devnet.
Devnet is a network run by Solana that runs on fake SOL.
Important to use anchor build to make a new build with program id.
Program id helps Solana runtime see all the accounts created by the program.
Connecting to web app
We need idl file, which is JSON file containing information about the Solana program, its functions and parameters.
This helps web app to know how to interact with the program.
Change the phantom wallet network to devnet.
Install via npm Solana provider which can interact with the program.
A function getProvider uses the above package to connect to the deployed program.
With program and account data, web app is able to fetch the data stored in the blockchain using the same function already defined in the Rust file.
The last bit was taking a gif link input and storing the data in Solana.
Account not persisting issue is solved by creating a separate file to store keypair.
This was the result.
Here is the link to the Football GIF Portal.

Ending Remarks
This guided code-along project provided a lot of learning. I like how someone new to coding could also follow along and experience cutting-edge technology.
For now, I'm still digesting all this information and exposure to new languages.
Would recommend anyone interested to learn web3 development try it out.
